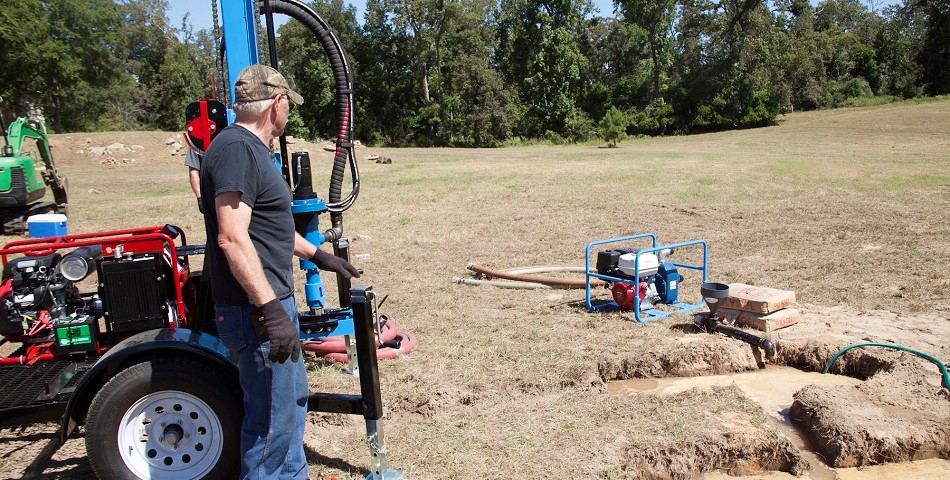
Drilling for clean, uncontaminated water can be challenging. From residential and commercial work to missionary drilling, rig operators, regardless of their experience, can encounter issues. Unfortunately, calling for troubleshooting advice isn’t always an option. Differences in time zones and drilling in remote locations can make it challenging to get answers quickly. From operating the rig to understanding how to address circulation loss or a caved-in borehole, there’s a lot to consider. Having the answers to these common questions prior to the bit hitting the ground will help make for a smooth drilling operation and a positive experience.
How can I reduce the odds of encountering a problem?
The effort put forth to drill a well doesn’t begin on site. Before purchasing or renting a rig, knowing the drilling conditions can prevent a number of problems from occurring. If drilling through sand, clay or gravel, a mechanical unit should be up to the task. For rock formations, hydraulic drills are the better choice. When drilling in hard rock, also be prepared with heavyweight drill pipe, tricone rock bits and possibly a DTH hammer. Bring a toolbox for taking care of minor repairs before they become more serious. It should include a pipe joint compound, grease gun, wrenches and miscellaneous nuts and bolts. In addition to having the right equipment, training and knowhow are equally important. Review resources from the manufacturer, such as the operator’s manual, and check if the manufacturer offers training classes or can recommend third-party courses. Also, see if there are step-by-step online videos to walk new drillers through setup and drill operation. Even with the right tools and training, however, operators can only fully anticipate what will happen above ground. Once a drill is 50, 100 or 400 feet down, unforeseen problems can surface. Here are a few of the more common troubleshooting questions that arise when well drilling operators are out in the field.
Why does the bit keep getting stuck?
While drilling, the drill bit may get stuck from time to time. In most cases, this happens as operators are drilling through sand or gravel. When the operator stops circulation to add the next section of drill pipe, the cuttings settle around the bit. If this occurs, operators should allow extra time, as much as 10 minutes, to flush the cuttings and loosen the stuck bit. If this does not resolve the problem, try thickening the mud with bentonite to assist in removing the cuttings.
Why did the mud pump swivel wear out?
Silica sand and cuttings in the drilling mud are the main cause of swivel wear due to their abrasiveness. A proper mud pit design will help alleviate the problem. Most water well rigs require a two-pit mud rotary system with a mud pump circulating the drilling mud. The mud is pumped from the suction pit to the bit, then back up, flushing out the cuttings with it. At the surface, the mud is pumped to the settling pit where abrasive silica and cuttings settle out before the mud gets to the suction pit. It’s important to use two pits or these materials will not sufficiently settle out and will then run through the pump, causing wear. It also helps to include at least one 90-degree turn in the mud stream so the flow does not travel straight through the pit system.
Why did the water level in the pits suddenly drop?
If the water level in the pits drops quickly, the drill most likely encountered a porous formation where the mud is seeping from the borehole into openings in the rock. Combat this by adding a thick bentonite mixture to the suction pit. Mix the bentonite thoroughly in a 55-gallon barrel of water by putting the suction and discharge hoses of the mud pump into the barrel and run it while slowly adding the bentonite powder. Mix for 10 to 20 minutes and work the suction around the bottom to catch any lumps. Remember that it takes about 30 minutes for the bentonite to fully hydrate and thicken. If the bentonite does not thicken, make sure the water’s pH level is at nine or above. If the pH is low, add calcium carbonate. When the mixture is ready, add it to the suction pit and continue circulating the drilling mud. If this does not solve the problem, add materials such as chopped straw to the mud to help clog the porous rock. If circulation still does not resume, it’s best to halt drilling.
The hole caved in, now what?
If the borehole caves in, try to work the bit loose. Sometimes it is possible to dislodge the bit and salvage the project. However, in the worst-case scenario, the bit and some of the pipe will have to be left in the ground and the well abandoned. To prevent the borehole from caving in, and equipment being lost in a collapsed hole, always remove the pipe during drilling breaks, even if it’s a quick lunch. If removing the pipe is not practical for some reason, simply raise the bit up about 5 to 10 feet and leave the mud pump running to maintain circulation. If a break will be long, or operation is halted overnight, the pipe must be removed.
What if I don’t hit water as soon as expected?
This is only a problem if the drill reaches max depth and there’s no evidence that points to a successful well. Regardless, it’s important to know what to look for as the drill reaches the point where it should be encountering water. The answer is in the drilling mud. Always monitor and keep a log of the drill cuttings in the mud as it exits the borehole. If the cuttings change to a fine or coarse sand or gravel, the bit has likely drilled through water-bearing strata. Another indicator is if the mud dilutes and the temperature drops. This is a sure sign that the mud is mixing with groundwater. The only way to be certain, though, is to develop a well and test the yield.
Why did the casing hang up as I was installing it?
This happens for different reasons depending on the soil. If this happens while drilling in clay, the ground is likely swelling and closing the hole in the time between removing the drill pipe and inserting the casing. The best solution is to pull the casing and ream the hole to open it. Sometimes, it’s possible to force the casing down, however, this might make it impossible to get the gravel pack around the screen. Another option is to use mud additives that mitigate the problem by preventing the clay from hydrating.
Am I done yet?
No. It’s worth noting that this is not a trouble-shooting question, however, the following steps are critical to ensuring the well is a success and future drilling endeavors are also successful. For the well to last and provide clean running water for years to come, it must be sealed off from surface water to prevent contamination. For the seal to be effective, the borehole diameter should be at least two inches greater than the casing diameter. The seal should reach the first impermeable sediment layer or, if that’s not practical, extend as deep as possible. For sealing, neat cement can be mixed with water to create a grout or slurry and be poured or pumped between the casing and borehole wall. To prevent water from collecting at the top, create a small berm at the surface and fill it with the same mixture. After the well is sealed, wait at least 24 hours before installing a water pump. In the meantime, properly clean and inspect the drill, pipes and all other equipment to ensure everything is ready for the next drilling project. This includes checking grease points, checking that bolts are properly torqued and cleaning drill pipes. These steps will help to ensure the longest possible service life for the equipment and reduce the odds that equipment troubleshooting will be part of the next project. While some complications are unavoidable, having the right equipment and knowhow are often enough to avoid a majority of well drilling problems and clear the unexpected hurdles that may arise.
Joe Haynes
President
Lone Star Drills


